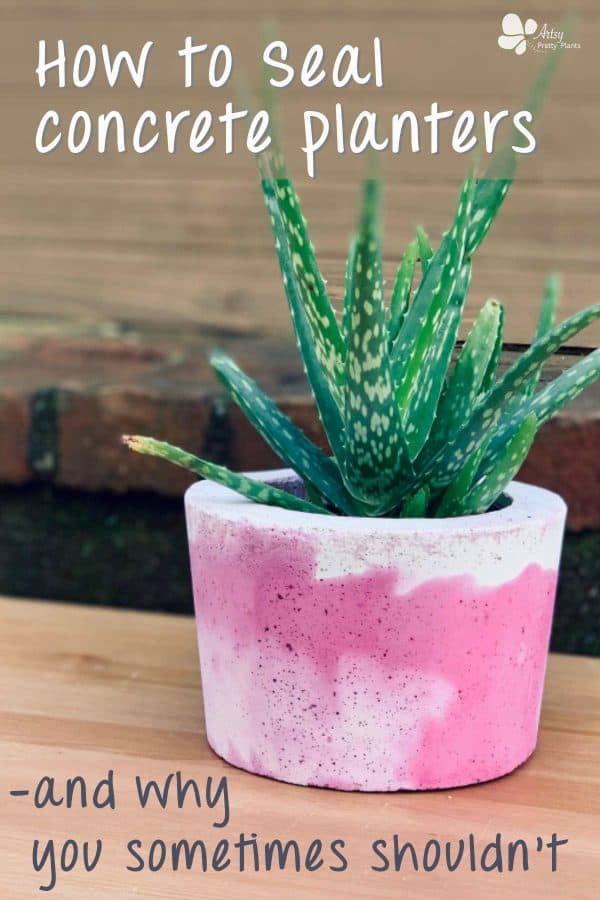
How to Seal a Concrete Planter (And When You Shouldn’t)
Does a concrete pot need to be sealed? There are important reasons why you should not seal one and reasons that you should. I’ll explain what those reasons are and show you how to seal a concrete planter properly.
You’ve probably heard a lot of facts thrown around about needing to seal a concrete planter, but most of those “facts” are born from a misconception or misunderstanding. So let’s break it down.
However, the very first thing you need to know about how to seal a concrete planter is whether or not you should even be sealing your planter.
You’ll first need to answer these three of these questions.
The answers to these questions will determine whether or not you should seal your concrete planter.
I’ve written this article from the point of view of working with DIY concrete planters.
If a planter was purchased from a store, it is more likely that it has a sealant or some type of protective coating applied.
1. Sealing A Concrete Planter Will Alter The pH Of The Soil
Okay, so let’s start with the first question, what type of plant are you planting and why is that important?
The reason the plant type is important is that a concrete planter that is not sealed, will have soil that is high in alkalinity. The alkalinity comes from the mineral lime that is found in concrete.
When wet, it will leach into the soil, causing the soil to have a high pH. A high soil pH (alkaline) is not the preferred pH for many plants, in fact, you will find a much longer list of plants that grow better in acidic soil than alkaline.
If you plan to plant succulents in your concrete container, then you have the perfect pot because succulents do better in alkaline soil. In that case, you should not seal the concrete.
Now there is another easy solution for reducing the alkalinity in the soil in order for you to plant non-succulent types of plants, and it doesn’t require sealing it. It’s as simple as soaking the pot in water for three days.
To get more detailed information, I have a full article on the wellbeing of plants potted in concrete pots.
2. Sealing Concrete Containers Will Them Less Porous
Next, is the second question about the amount of maintenance required with a pot that isn’t very porous.
Plants will require a little less maintenance if they are potted in a concrete planter, especially if the plants prefer to be on the drier side, like succulents.

Concrete is porous and so moisture will evaporate through its pores. This makes it less likely that your plant can die from overwatering and root rot is less of a concern.
If you seal the concrete, you are closing many of the pores. Sealing it will not make the planter waterproof, and there will still be some evaporation.

By the way, regardless of the fact that concrete is a nice, porous material, it’s important that your concrete pots have drainage holes.
If your pot gets soaked, the drainage holes allow for the excess water to drain more quickly and avoid root rot.
The porosity helps, but the pot will retain too much water without drain holes. Here’s how you can create drainage holes when casting a concrete planter.
The amount of water the planter will retain depends on the type of sealer you use and the number of coats.
A sealed concrete plant pot is certainly better than a plastic container type of pot, which will be prone to root rot.
I have details on concrete sealers and water evaporation here.
If you are concerned about overwatering, and you are planning to plant plants that need acidic soil, then clay pots are a good choice as an alternative.
3. Sealing The concrete Protects The Finish From Discoloration
The third question was regarding the importance of aesthetics. For decorative planters, where you want to maintain the finish, sealing will be important.
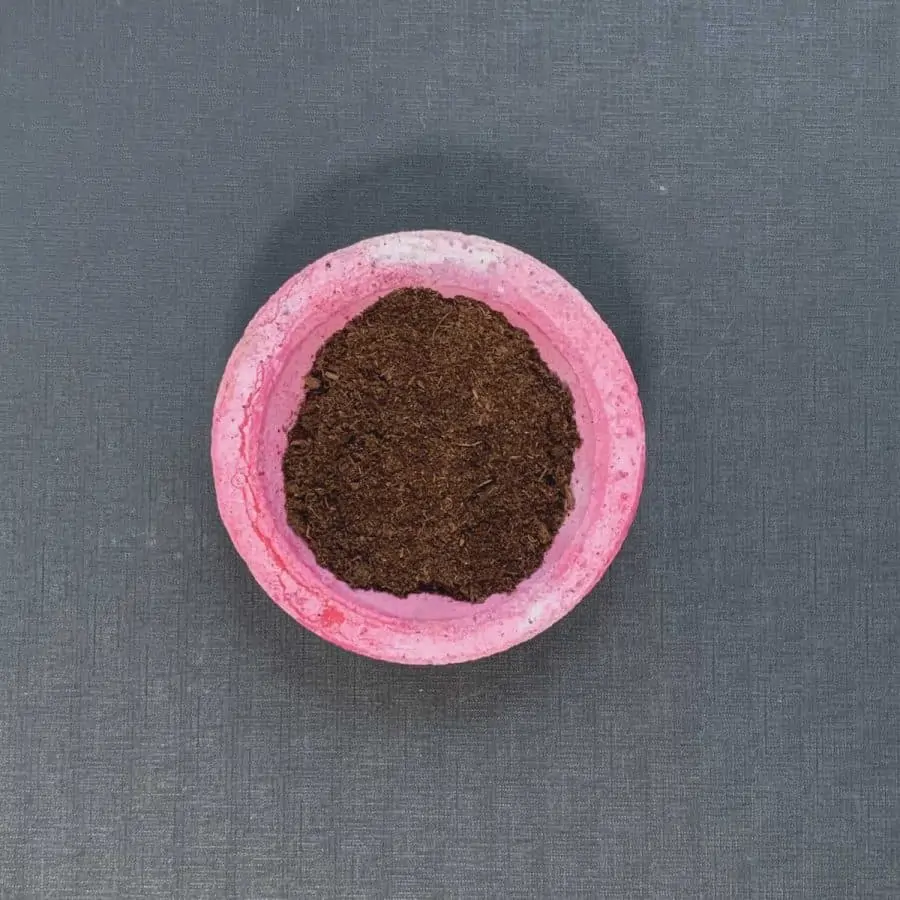
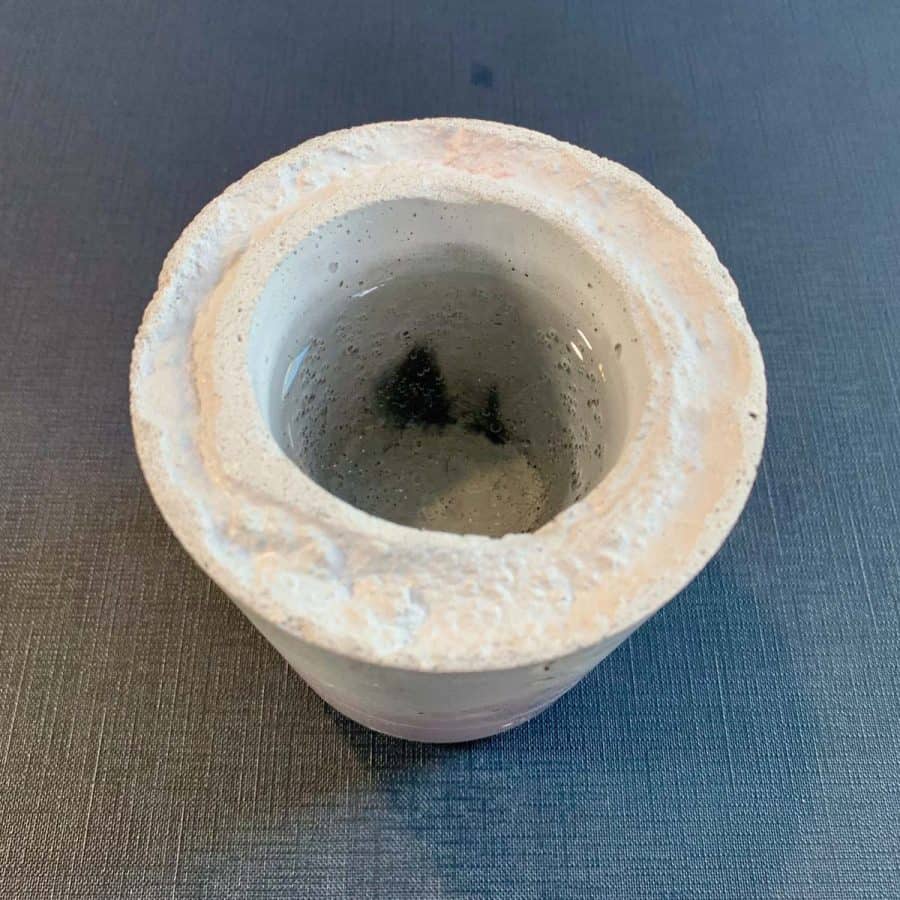
Soil mixed with water is a brown color and the brown water, along with minerals from the soil will penetrate through the pores in the concrete.
This will cause some discoloration and the minerals can even sometimes create a frosty effect.
In this case, I recommend double sealing the planter where you will seal the inside of the planter twice, as well as the outside.
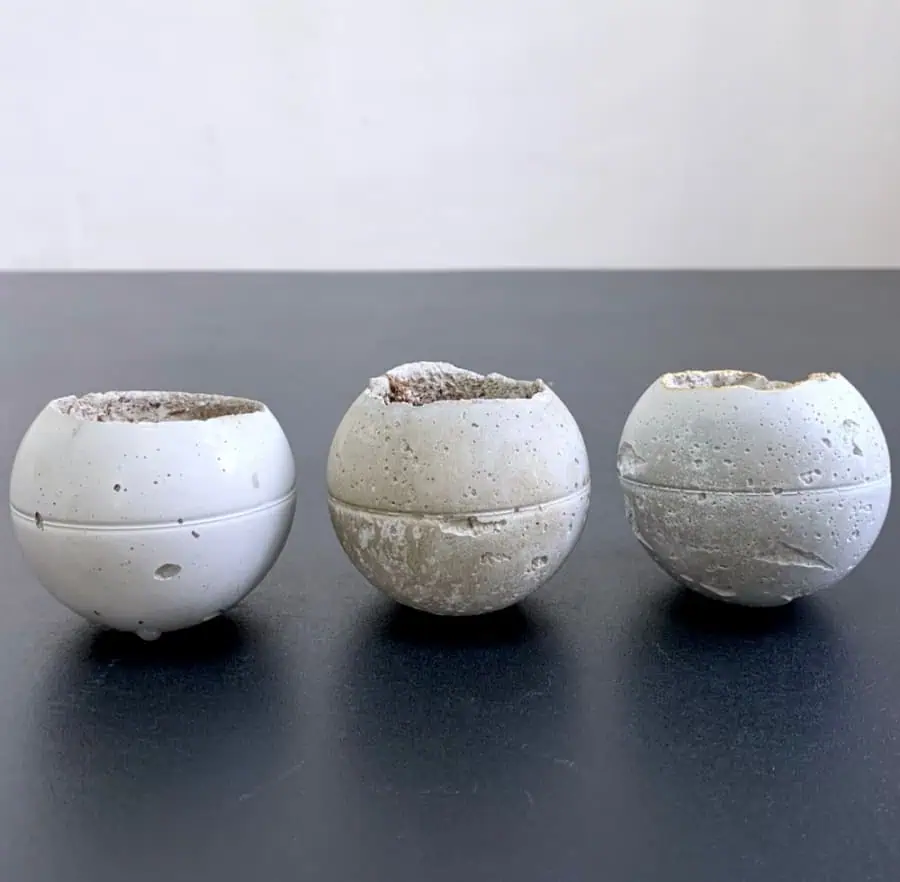
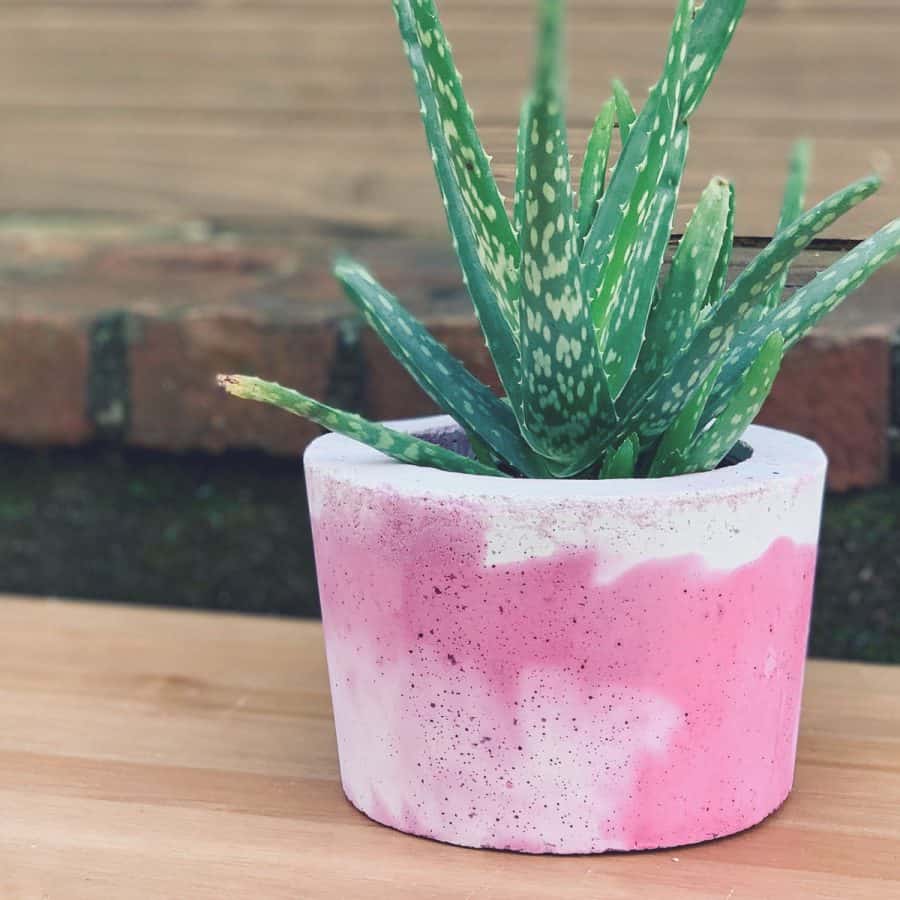
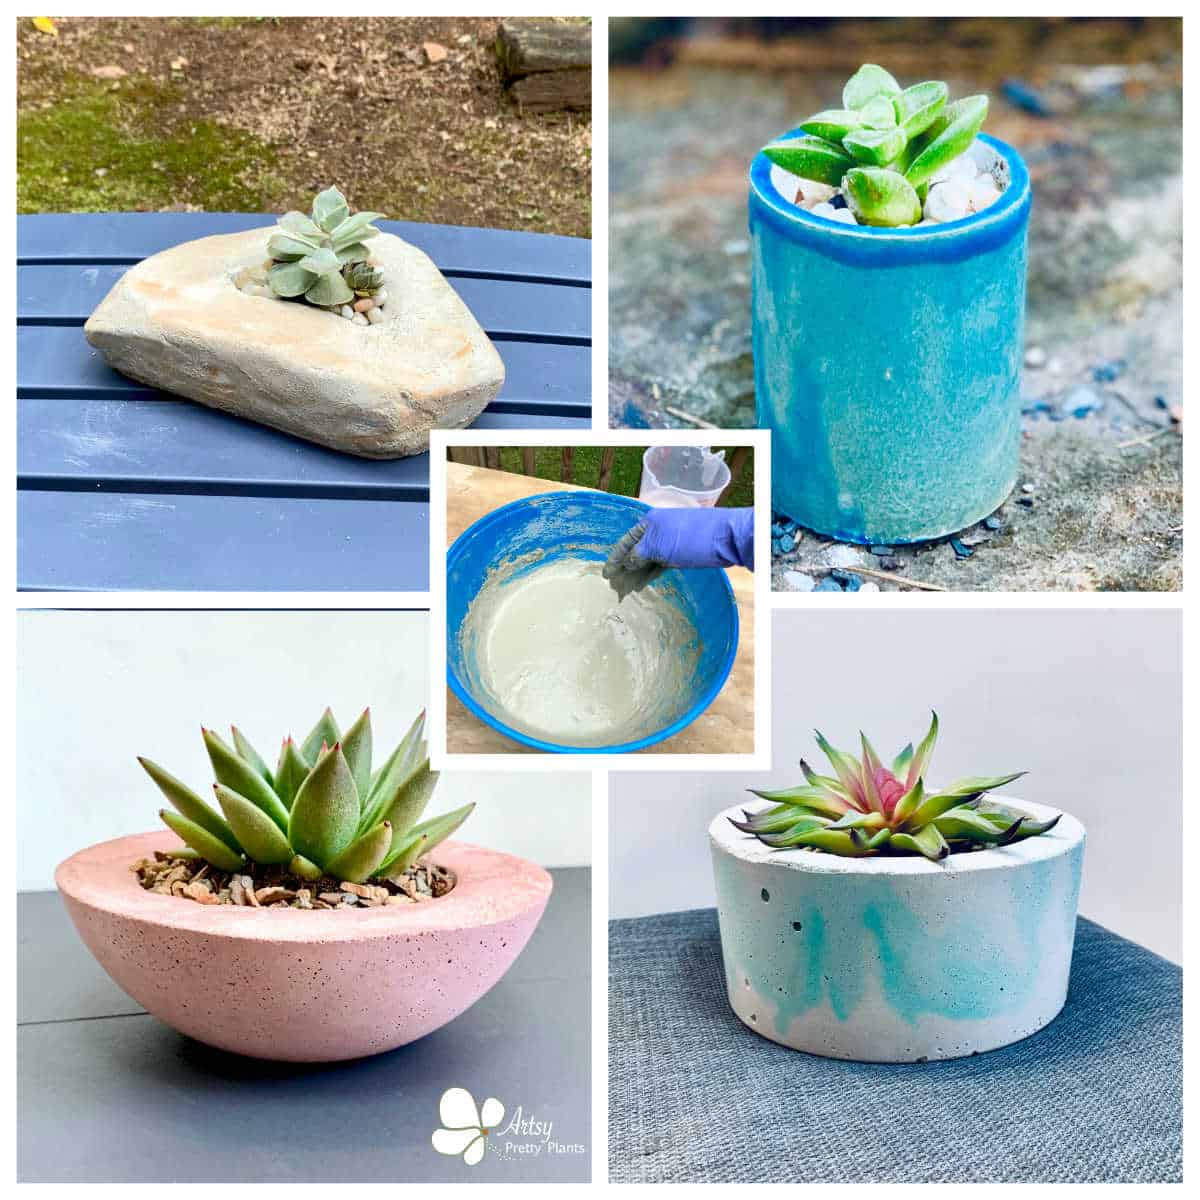
In the photo above, the planter on the left was not sealed, but it was cast against a smooth, shiny mold and so it came out with the same finish.
A smooth, shiny finish will help naturally seal concrete. The other two cement planters were demolded early which caused them to be matte. Matte concrete will be more porous.
The center planter wasn’t sealed and so became discolored with soil and minerals and salts. I will say this is an extreme example.
The planter on the right was sealed inside only, and is also an extreme example. These were outside for years and the finishes of the matte ones were quite rough.
So when making a concrete planter, keep that in mind, ones that are cast in shiny, smooth concrete molds will have a smooth, shiny finish and will hold up to discoloration the best.
You can read more about this where I tested the effectiveness of sealers on soil discoloration in my cement tests article.
And for part two of the question, where will the planter be located? For indoor planters, sealing the outside of the planter isn’t going to make much of a difference.
If you want to maintain the brightness it will help to seal the inside.
But again, you suffer the consequences of making it relatively non-porous, and you will need to pay close attention to your plant’s watering needs.
Another thing to consider if you have your planter indoors is that cement is powdery and creates cement dust.
You can rinse it, which helps, but eventually, more dust will come off.
Sealing the outside will eliminate cement dust without affecting the porosity.
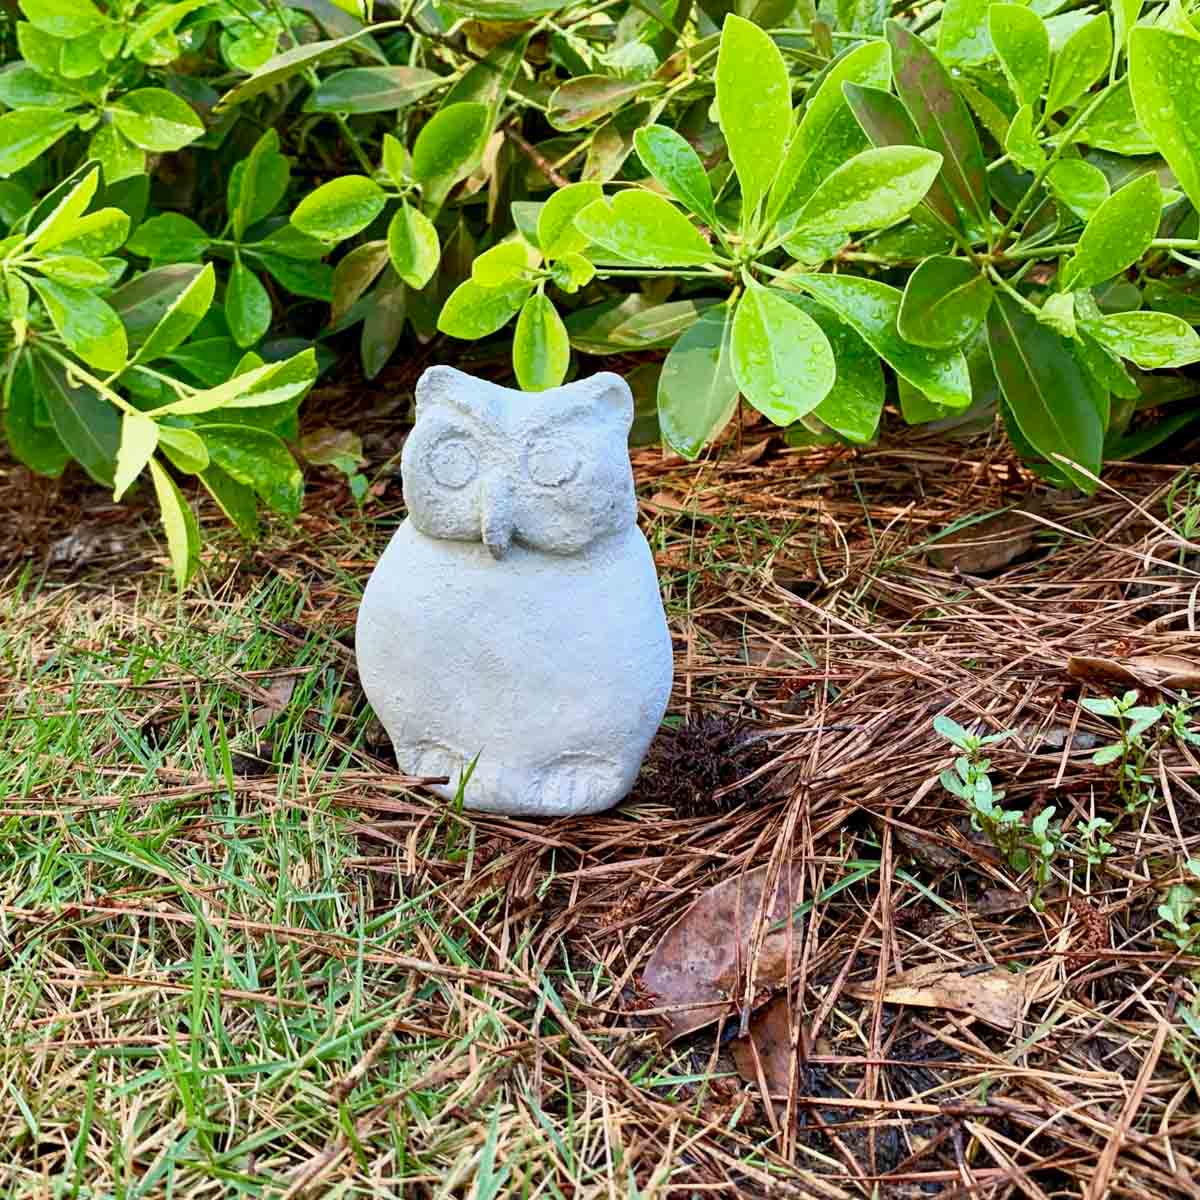
Outdoor planters that aren’t under a roof like a covered porch, will be exposed to rain, snow and sun.
More than half of my planters are outside, exposed year round.
Many don’t even have plants in them in the winter, because as you can probably imagine, I have a gazillion of them and no place to keep them.


Some look aged, some look just fine. For example, the concrete planter in the photos above had been sealed with one coating, inside and out.
The one on the left is the before it was potted, the one on the right is 2 years after. The view is from a different side and lighting not exactly the same, but there is very little discoloration.
So again, if looks are important, and your planter is exposed and outside, then seal the planter inside and out. I recently wrote an article on how sealers can help colored concrete retain the color.
The decision to seal a concrete planter will come down to the answers to those three questions, and if you decide you need to seal your planter, then those answers also will determine how you will seal it.
I have only a couple of planters that are sealed and the reason is because I wanted to maintain the vibrant coloring, or brightness of the white cement.
The Best Sealant For A Concrete Planter
If you decide to not purchase the ones above, then pay attention to the labels, because many sealers are semi-gloss or gloss, which may be your preference instead of matte.
One other thing worth mentioning is you can also effectively seal a concrete planter by painting it.
The best kind of paint to use for this is acrylic paint. You can also use standard spray paints, and again acrylic is best.
If you do paint your cement pots, you’ll need extra protection, so spray a layer of a clear acrylic top-coat over the paint.
Some of the links on this page have been provided as a convenience for finding materials. These links may also be affiliate links. As an Amazon Associate I earn from qualifying purchases, at no extra cost to you.
I only recommend products I’ve used and loved, unless otherwise stated. Click here to read my full disclosure policy.
DIY DIFFICULTY LEVEL | Easy
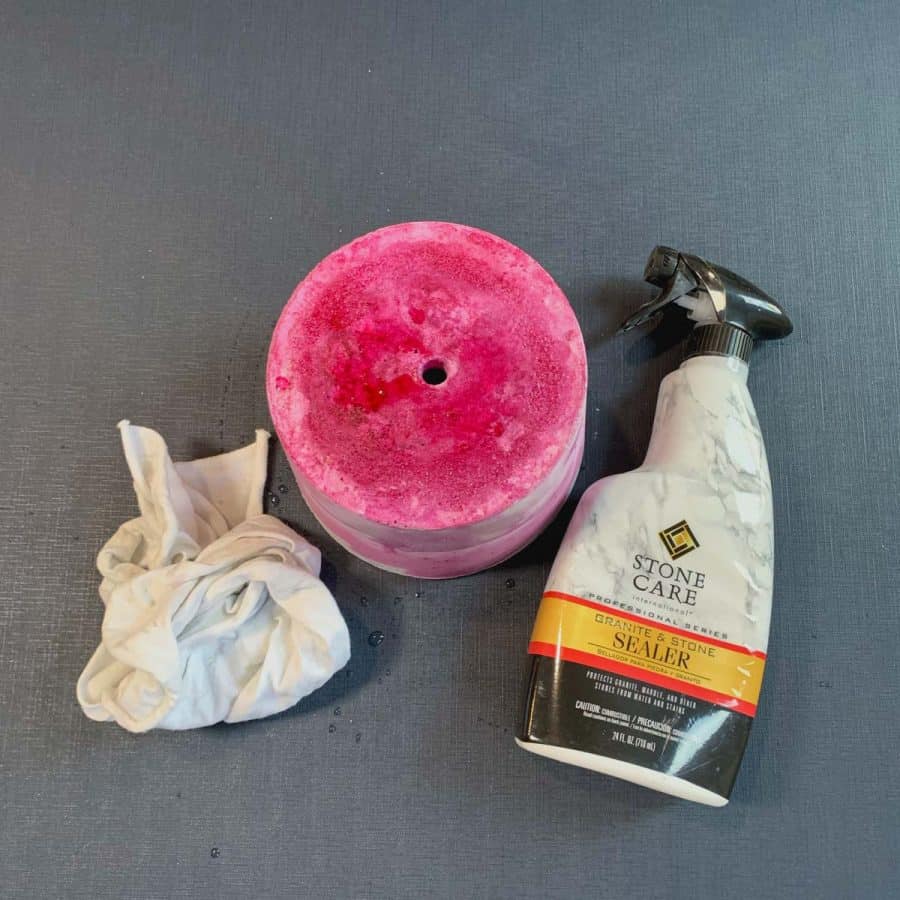
How To Seal A Concrete Planter List of Materials
- Concrete sealer
- Foam brush
- Cloth rag
Note: There are many sealers available and I’ve tested six of them. If you didn’t catch it above, I have an article that has lots of in-depth information on the effects of concrete sealers.
Tutorial Steps For Sealing A Concrete Planter Pot
For the fullest protection (maintaining the finish) apply two coats of sealer to the inside of the planter and two to the outside.
For protection from the lime leaching causing alkaline soil, apply two coats inside the planter and one outside. Or skip the sealing and soak in water for 3 days.
For simple protection that still allows for some porosity to help with watering, only apply one coat on the inside and outside.
It’s a good idea to reseal your concrete every year on the outside. Just be sure the planters are clean and oil free when you do.
I’m assuming you are using one of the sealers I recommended, if not, then follow the instructions on the label of your bottle.
Step 1. Prep The Workspace And Planter
Wipe the planter down with a lint free cloth to remove any dirt or cement dust.
These instructions are for sealing for full protection. Just omit whichever steps you want if you don’t need that much protection.
This can be messy, so set up your workspace with newspapers or dropcloth. Turn the planter upside down and start with the outside of the pot.
*** The application technique will depend on which sealer you use, so always follow the instructions on the manufacturer’s label. These directions are specifically for the Stone Care spray sealer or the Easy Seal brush-on sealer. But Step 1 is the same for both products.
Seal the concrete planter with the spray sealer:

Step 2. Apply The Sealer To The Outside Of The Pot
Shake the bottle of concrete sealer and then apply the first coat of sealer starting at the top of the planter bottom. Spray it liberally over the entire surface of the concrete.
Work your way down the outside of your planter. Take care that it is thoroughly wet, but also try not to let it get drippy.
Let this base coat sit for 3-5 minutes, and then apply a second coat. At 30 minutes, wipe off any excess. I like to rub the whole area to ensure an even coat.
Step 3. Spray The Sealant To The Inside Of The Concrete Planter

If the planter is dry to the touch and not tacky, then you can apply the first coat to the inside of the pot.
Do the same as above, let it sit for 3-5 minutes, then spray on a second coat and at 30 minutes, wipe the excess and rub in.
Step 4. Spray A Second Coat For Added Protection
After an hour, you will repeat Step 2 and Step 3.
Seal the concrete with the brush-on sealer:

You can either brush this on or pour the sealer into a spray bottle. In either case, I recommend rubbing it in after spraying or brushing.
If you brush it on, I have found it goes on smoother with a foam brush than a paint brush.
Step 1. Same As Above
See Step 1 in the method above.
Step 2. Apply The Sealant To The Outside Of The Planter

Spray or brush the sealer over the top of the bottom of the planter and then over the outside sides.
If you spray, then use a cloth to even rub the sealer onto the concrete.
Step 3. Add The Sealer To The Inside Of The Concrete Pot
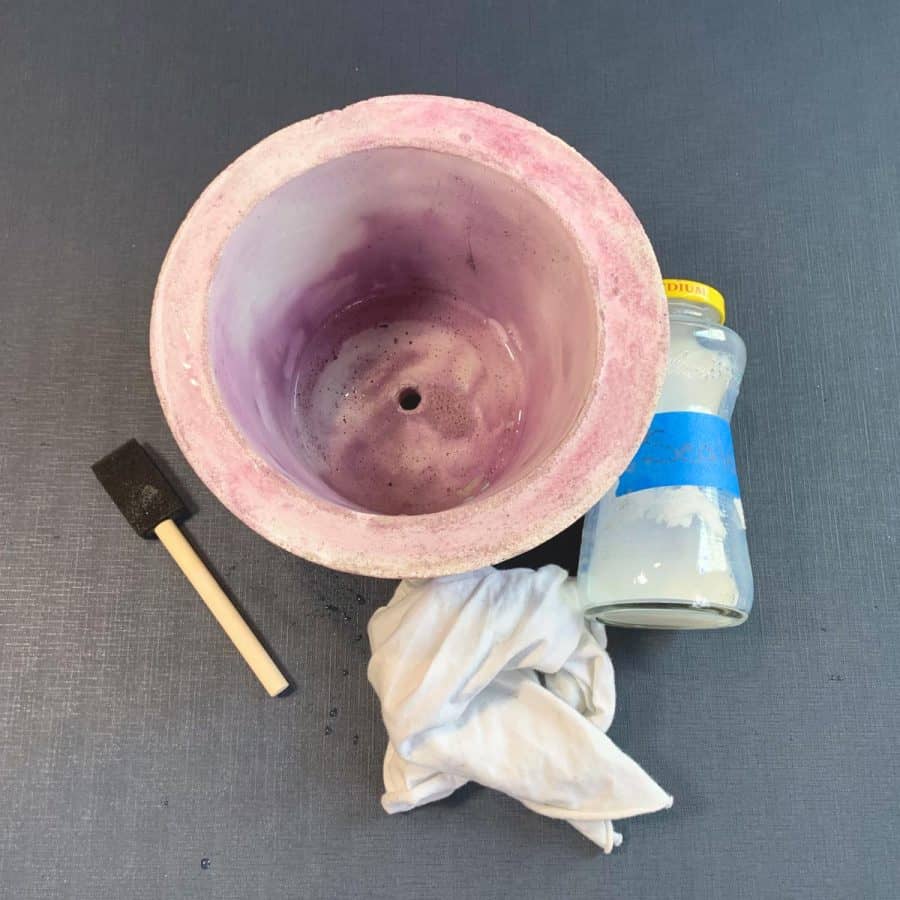
Wait about 15 minutes for it to dry. Make sure the surface isn’t tacky, then you can flip the planter over and apply the sealer inside, and follow the same steps.
Step 4. Apply A Second Coat For Additional Protection
After 24 hours, you can apply the second coat and then repeat Steps 2 and 3.
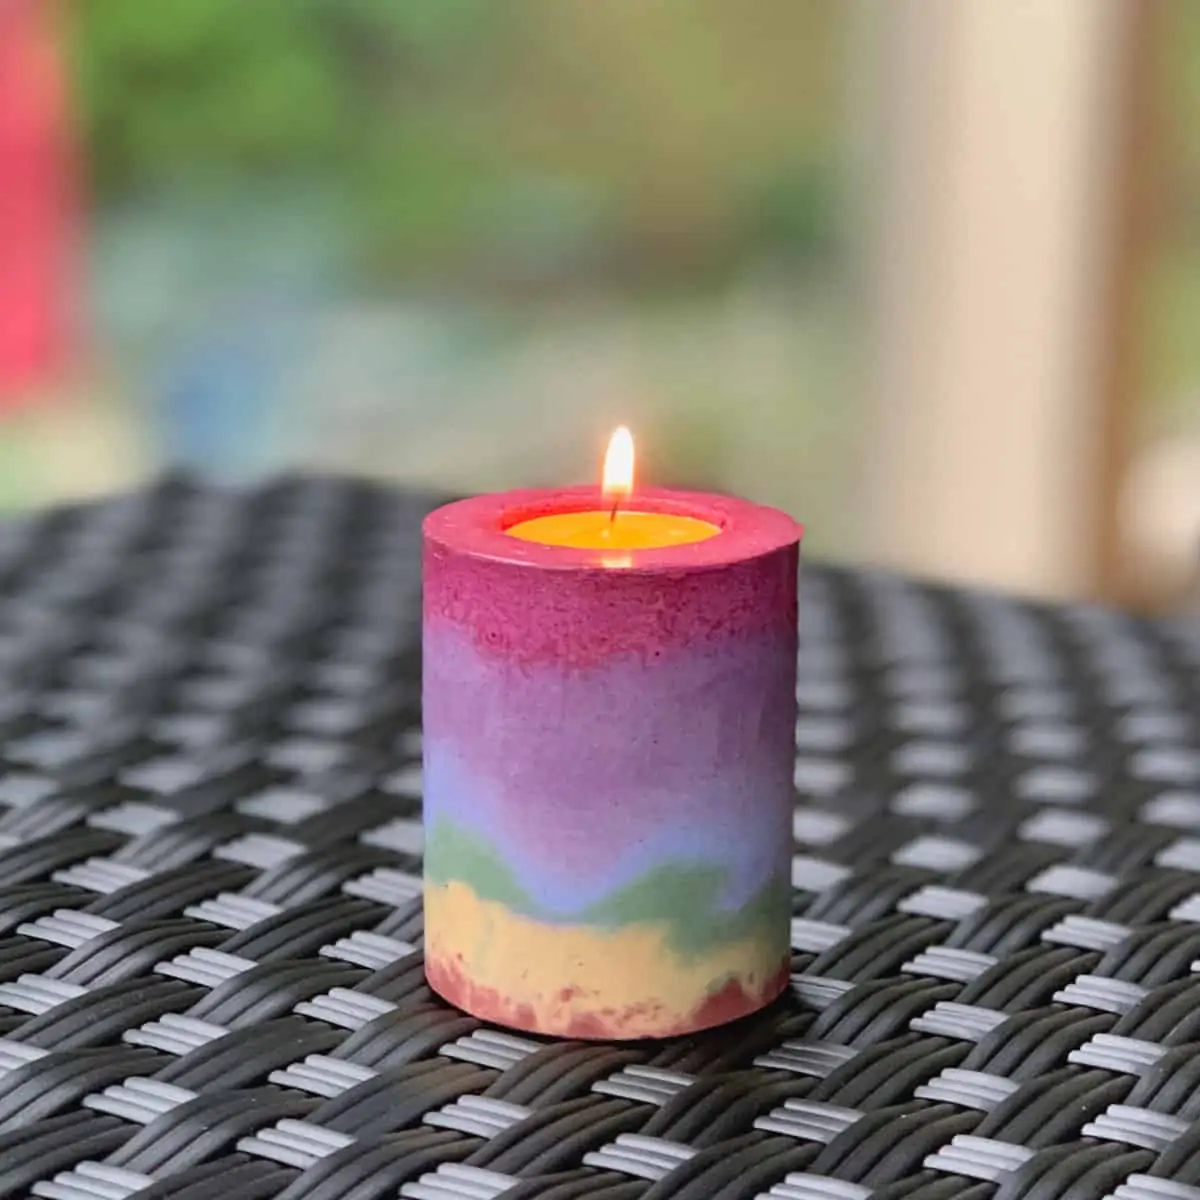
How to Seal Concrete Crafts
Okay, now you’ve mastered when to seal a concrete planter –and how. But what about other concrete crafts?
When is it important to seal items like cement coasters, concrete candles or a magnetic cement key holder? The answer for this is a little different.
I mentioned earlier on in this post that when you have an indoor planter, you may want to consider sealing the outside because some cement dust rubs off and becomes powdery.
This is a never-ending battle concrete. At least for the handful of years now that I’ve been doing this, my unsealed concrete crafts still create dust.
So the quick answer is that you really should seal your concrete crafts that are the indoor, home decor type (anything that’s not a planter).
Sealing them will prevent the powder from coming off, as well as help prevents them from staining and scratches.
Notice I said, “help prevent”. The sealers aren’t perfect, but they usually do a great job. The concrete or cement type used sometimes plays a factor in this, so don’t always blame the sealer.
So how do you seal concrete crafts? You seal them the same way you do a planter. But I recommend sealing them inside and out, and applying two coats.
Just follow the same steps above for how to seal a concrete planter. Or you can follow this tutorial for how to seal a concrete candle.
Don’t forget to Pin it for later!
Don’t forget to Pin it for later!

How To Seal A Concrete Planter & When Not To
Step by step for how to seal a concrete planter, and why sometimes you shouldn't seal it. Sometimes concrete is better when not sealed.
Materials
- Concrete planter
- Concrete Sealer
- Foam brush
Tools
- Please see the full materials list above the tutorial.
Instructions
Spray Method For Sealing The Planter
- Before Sealing, Prep The Workspace And Concrete Planter With A Drop Cloth
- Apply The Spray Sealer To The Outside Of The Pot Starting From the Top
- Spray The Sealant On The Inside Of The Planter Thoroughly Wetting
- If You Need Added Protection, Then Spray A Second Coat
Brush-on Method For Sealing The Concrete Planter
- Before Sealing, Place A Drop Cloth On Your Workspace
- Brush The Sealant Over The Bottom And Sides Of The Outside Of The Planter
- Now Add The Sealer To The Inside Of The Concrete Pot
- Apply A Second Coat If You Want Additional Protection

Hi!
Some of my concrete planters are fine when unmoulded and sealed. But once I plant them, they crack.
Any recommendations or possible explanations? Please.
Hi Magdi,
That’s a tough one because I haven’t experienced it. The only thing I can think is that they must be fragile to begin with. Are you planting them very soon after making them? Concrete takes 28 days to reach its final strength. So maybe wait a few weeks before planting anything in them? You shouldn’t really need to, but it may help. It could be the mix and it could be too much water in the mix, but it’s unusual that the cracking wouldn’t happen sooner. I would try a different mix and use as little water as possible. Sorry, I wish I had a good answer for this.
Thank you!
I will try less water and wait a bit longer. I will keep you posted.
Thanks again!
I made my own pot without a mould and it finished rough, how can I make it smooth especially round shap e?
Can I also use grout to strengthen and seal concrete pots?
Hi GL,
So, unfortunately, it’s the mold and the texture- smoothness of the mold that makes concrete smooth. Concrete takes on the texture of what it’s cast against. So anything exposed to air, will always be rough. You’re best bet for smoothing it out is to mix up a very thin mixture od of your mix, this called a slurry, and our it over the pot. This isn’t an easy technique because it can be difficult to cover it evenly. You can use your hands, but use them minimally, the more you touch the mix to smooth it on the pot, the more you’ll pull the gritty parts of the cement/concrete to the surface.
No, grout is anything but strong. It will eventually crumble and will not seal it. The slurry will actually help strengthen it, but of you made your walls thick enough for the size pt, then it shouldn’t be needed. But if they are thin, a good way to fix this is to pour a slurry inside and roll the pot around to get full coverage. Works like a charm. You can see this in my cement balloon planter tutorial. There’s a video there too. https://artsyprettyplants.com/cement-balloon-planter/
If you insist on sealing the planter, use a concrete sealer. I like Easy Seal- you can get it on Amazon. If you’re wondering why I say “insist” :0), read this article about why maybe you shouldn’t seal planters. https://artsyprettyplants.com/seal-a-concrete-planter/
Ellen
Hi Ellen,
I would really like some advice on sealing my concrete planters. I make very large planters from big wash basins and they are undealed. It is normal for large unsealed concrete pots to crack over winter and they have. It’s not a problem for me, however I’d like to make a few to sell but I don’t want them cracking on someone over the next winter.
I live in South Africa so am not sure if the sealant you recommend is available here so would like to know if you recommend I use a normal paint on sealant, whether to seal both inside and out, and if these sealants are safe for plants.
Looking forward to hearing from you.
Hi Angie,
I recommend you do both. Seal first and then paint. That would offer the most protection from water, which is why I assume these very large planters sometimes crack. And yes, seal inside and out. The concrete sealant I use is safe for plants, it’s sold on Amazon, so you should be able to quickly check it’s availability in SA. Any water based (acrylic) sealer should be safe- same for the paint- use water-based/acrylic.
I’ve used Sculpt Crete to create a planter. It’s a clay type concrete. The planter has dried, but now I would like to add a nose. Do you know how to ensure that it will stick properly? Or, if it would be possible. Thank you for your help!
Hi Janice,
I just replied to your email about the Sculptcrete itself, sorry for the delay.
Some types of concrete mixes are made so it can bond to itself. I’m not sure if this is one of them. It’s work trying with a wet slip idea. If that doesn’t work, some manufacturers make an acrylic bonding agent to apply before hand, Sculptcrete should have something about this in their Datasheet. There are other mixes you can use specifically for this, but I’m not sure what they would be called in South Africa.
Another option is good old fashioned 2 part epoxy. Another good one is construction adhesive. I’ve had luck with both.
Thank you so much for your suggestions. I will look into those options. Thanks for the tips.
Hi Ellen.
I recently started making concrete flowerpots- I’ve followed all the steps in your guide, from less water to wet curing but they are still cracking after a couple of days after wet curing. I cure them for 7days and after a few days the start of crack Please help
Would you recommend applying a sealant ?
Hi Clara,
What mix are you using? You really shouldn’t need to wet cure anything. Are you curing in a cool, dry location? It sounds like it might be the mix type. Also, what size are the flower pots and what thickness are you making the walls?
A sealant isn’t going to help if they are cracking right after curing. More details about, mix, molds, sizes and curing conditions will help me diagnose. 🙂
Hi Ellen.
For the mix- I mix two parts cement, 1part aggregate ,and a liter of water.
For the curing method I cover them with a plastic to lock the moisture in for about 5-7days.
The mold sizes are 8 *8 cm and the thickness is 0.5cm thick.
.5 cm is fairly thin. I assume your aggregate is sand? Gravel won’t work at that thin of a mold. I would do 3:1 with a mold that thin. It’s likely too much sand.
It’s even possible 4:1 is the way to go.
Thank you Ellen I’ll try this instead
A most interesting instructions regarding sealers, I wish I had read before but I sprayed outside twice and put bubble wrap on the inside and so far (touch wood) my flowers (angel trumpets) are growing. I love working with cement (so therapeutic, fighting cancer, I wore double mask when making pots)! I LOVE YOUR ARTICLES, thank YOU!
Hi Susan,
You are welcome! I’m glad you found the article helpful! I think Angel trumpets need a lot of water, so it’s probably good you sealed your planter.
Oh gosh, I wish you best wishes with your recovery. Hugs.
I am designing some cement planters that I want to have in a self watering design where they have an inner liner that holds the soil and plant and suspends the plant above the planter bottom on legs that have slots in order for the water to wick up into the soil. My question is should I seal the inside if it constantly contains a level of water at the base? I don’t plan on putting a drain plug because I don’t want to have any leaks.
I’m not sure I fully understand. Is this like a self wicking/watering planter? https://artsyprettyplants.com/diy-self-watering-planter-concrete/ I didn’t use a drainage hole for that, and I painted it which essentially sealed it, and in that case, yes, sealing would be preferred. I realize you are using a liner, but I think I may need a photo to see what you are trying to do. Can you email me? Sen to ellen at my website name.com?